Introduction
A while back I published my PSDellAsset PowerShell module. Although this module can be universally used within PowerShell, it was written with the intention to enable Dell warranty status monitoring using PRTG which is a Window based monitoring solution. This post will explain how to configure PRTG to enable Dell warranty status monitoring using the PSDellAsset module. Feel free to make adjustments to match your environment and requirements.Prerequisites
Working PRTG installation, WMI access to the Dell machine to be monitored (Network and security access) and obviously the PSDellAsset PowerShell module. In addition a wrapper script is required which can be found below. Copy this script "Dell - Get Entitlements.ps1" to the PRTG custom sensors folder which is in my case "C:\Program Files (x86)\PRTG Network Monitor\Custom Sensors\EXEXML".End Result
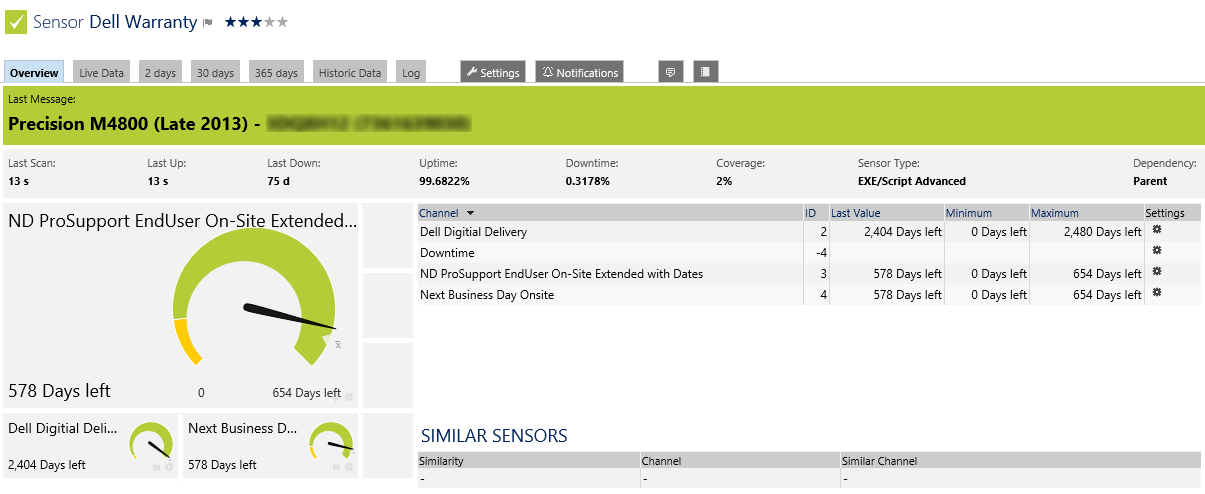
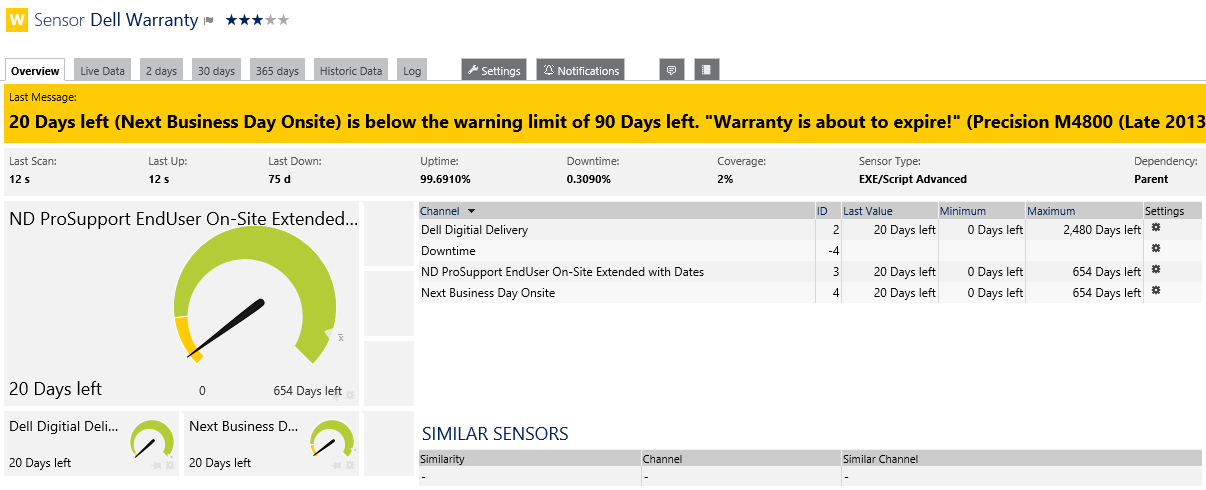
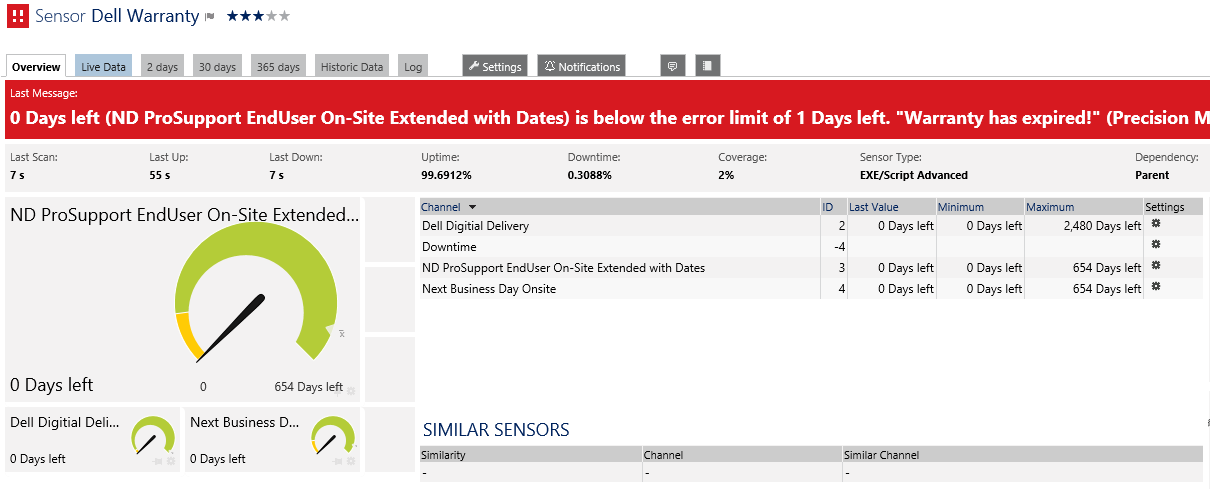
We will use a so called "XML Custom EXE/Script Sensor" sensor that PRTG provides. A PowerShell script that acts as a wrapper for the PSDellAsset PowerShell module which returns the values in XML conform PRTG's API interface definition. Each entitlement for a specific server will get its own channel configured automatically. In my example we will have three channels: Next Business Day Onsite, ND ProSupport EndUser On-Site Extended with Dates and Dell Digitial Delivery. The sensor title will show (retrieved from Dell): Description of model, ServiceTag and Express Code.Below a screenshot of each status (OK, Warning and Error):
Configuration Steps
OK, enough chatter. I am assuming you have basic knowledge about PRTG. The PowerShell wrapper script automatically sets the one-time sensor specific settings. Per default a warning is triggered when 90 days are remaining, and a error is triggered when 0 days are left. This can be changed afterwards in the sensor configuration screen.- Within PRTG select the server where you want to add the warranty check;
- Click the button "Add sensor";
- Select "EXE/Script Advanced" type;
- Fill in the required details (leave the rest default):
- Sensor Name: Dell Warranty
- EXE/Script: Dell - Get Entitlements.ps1
- Parameters: -Username %windowsuser -Password %windowspassword -Hostname %host
- Click the button "Continue" to create the sensor.
No comments :
Post a Comment